Showing posts with label Hero Arts. Show all posts

Saturday, April 21, 2012

Cards for a Cause Fall 2011-Spring 2012

In an attempt to catch up on all of the happenings in our Cards for a Cause group, I am doing one massive post covering all of the cards that we have done since I privatized my personal blog last fall.** We have 73 cards pictured here that will soon be delivered to the hospital for ladies undergoing chemotherapy to use to brighten a loved one's day.  Please pray over these cards, for the people who will use them, and for those who will receive them. So without further ado, here are the cards that the most wonderful group of Christian ladies has put together over the course of this year!!!

Card #1: Chevron City!


I absolutely love following Jennifer McGuire's blog, because she is one of the most talented crafters out there today. I got the idea for the chevron stripes card from her you tube video here. It includes a step-by-step tutorial if you are interested in recreating these cards. Just keep in mind, this type of card is very time consuming.


I love all of the different color schemes that were used on the cards. Some were very subdued and soft, while this one caught my eye, because of its cheeriness and how it reminds me of strawberries!


Supplies:

Cuttlebug Machine
Embossing Folders: Cuttlebug, Sizzix
Buttons & Twine: Papertrey Ink
Stamps: You Make Me Smile, Hope Your Day is Fabulous, So Sweet of You - Papertrey Ink; I love you - Ali Edwards for Technique Tuesday; Happy{Birthday} - Studio G

Card #2: Post It Mask

This card was one that I learned how to make while taking the Clean and Simple Card Class. You simply place a post it note in the center of your square card and stamp a large background stamp right over the top. The Post It masks off the center area where you can stamp your sentiment. I have found that the best combinations include versa mark ink for the background stamp, because you want it to be subtle an monochromatic and white gel pen/white ink for the sentiment. Lastly, the three little doo dads that are adhered over the sentiment should be done so with dimensional adhesive so they pop right off the page and topped with a little bit of stickles--Robbie's orders.


I didn't like this card when I first made it, but now that I have had time away from it, I realize that I really do love it!!!

I also really love this card, because the sentiment font has rounded edges just like the background stamp.

Supplies:

Stamps: Various. Many of the backgrounds are from Hero Arts, Many of the sentiments are from Studio G.
Punches: Studio G
Patterned Paper: Basic Grey
Cardstock: Various
White Ink: Colorbox Chalk Ink Frost
VersaMark Ink
Stickles
White Gel Pen (Uniball Sigmo)

Cards #3 & 4: Sending Blessings Your Way

By Diane A.

Diane always impresses me with the cards that she designs for our group. They are always very simple and easy for anyone to construct, but always pack a nice design punch and wow factor :-)

The butterflies were punched out using a large punch. The teal flower design was stamped and cut out. Very simple, yet very effective! And fun to see the same card done two different ways!


Card #5: Thinking of You

By Diane A.

Again, another job well done on Diane's end! This card looks like it would take hours, but it was actually quite easy to assemble and went very quickly!!!  Cut yellow polka dot paper, ink edges, and adhere to card base. Cut white rectangle. Add 4 patterned paper strips. Stamp sentiment. Round Corners. Ink everything. Adhere white rectangle to card. Punch 2 flowers and flower center. Glue layers to each other and down to the card. Add pearl. Done!

Great Design, Easy to Assmeble!


Supplies:

Patterned Paper: Crate Paper, Hobby Lobby
Sentiment Stamp: Studio G, Michael's


Card #6: Happy Birthday, Sweet Thing!

I was thrilled beyond thrilled when my Papertrey Ink box came in and I received the supplies needed to make this card. I just love these little playful ice cream cones that you can stack to whatever height you want!  You can cut them out of felt or use paper and add stickles to make them really sparkle!  I just love how versatile it is, too--works for both boys & girls.


Supplies:

Cuttle Bug Machine
Swiss Dots Embossing Folder - Cuttlebug
Stamps, Dies, Patterned Paper - Papertrey Ink
Rhinestones, Michael's
Stickles
Brown Ink - VersaFine Vintage Sepia
Pink - Papertrey Ink Raspberry Fizz

**I really regret having to do that, but my daughter's safety is our number one priority. I was not comfortable with the general public (I almost had 10,000 views!) knowing the ins and outs of Addison's daily routine. (Email me (only if I know you) and if you would like to follow that blog, because I can add you to my list of approved readers.)

Tuesday, January 17, 2012

CAS Week 1 Entry 3


I am LOVING this sketch from Kristina Werner!!!  You are my card-making hero!!!

Tuesday, January 10, 2012

CAS Week 1, Entry 2


 Those hearts really sparkle!


Clean & Simple Card Class Week #1

Keeping it simple for this class...including the blog post ;-)

I figure I would rather spend the time making more Clean & Simple cards than typing about how I did it...other than to thank Kristina for the advice on choosing colors for the card...thanks!


Saturday, May 14, 2011

Make It Monday #14: Selective Inking


I always enjoy Papertrey Ink's Make it Monday challenges. It gives me a fresh idea for cardmaking each week.

This week's challenge is to ink up only part of the stamp to get a whole new look. On my cards, I used this technique to extend the length of one of the background stamps from the set, Background Basics: Retro.

Then, I used some of my new Hero Arts stamps to make a simple card with a bit of stickles on the background stamp. I just love how the Papertrey Ink stamps are versatile enough to work with other stamp sets and even sets from other companies.


Supplies:
All cards: Background Basics: Retro, PTI

"Have a Wonderful Day" Card:
Black Ink: Versafine, Tsukineko
Green Ink: Moss Green, Colorbox Chalk Ink
Pink Ink: Raspberry Fizz , Papertrey Ink
Fillable Frames #1, Papertrey Ink
Coordinating Die
Flower Fusion #1, Papertrey Ink
Tag-its #2, Papertrey Ink

Glitter Glue: Stickles, Ranger

"Thank You" and "Hello" Cards:
Congrats, Hero Arts
Ink Yellow & Grey: Studio G, Michaels ($1 bin)
Ink Raspberry Fizz (Pink): Papertrey Ink
Ink Black: VersaFine, Tsukineko
Glitter Glue: Stickles, Ranger, Papertrey Ink

Tuesday, April 19, 2011

Oh, the Places We'll Go!

Our daughter was born. I was a new mom. I had no idea what I was doing...
When my mom and Jim left and my husband went back to work, it was just Addison and me. I had to learn how to take care of a baby and figure out what activities we could do...could we do any activities together? She didn't talk, do anything with her hands, look at me, or anything that would come close to communication between us. I made this layout with the thought in mind that eventually babies come to communicate, they grow up and we will be able to play, eventually. I'm not sure why I thought she would be born able to communicate; I guess I just hadn't thought it through ;-) This layout is a list of some of the things that I look forward to doing with her after she is out of the baby stage (and by then, I'll probably be wishing she was still a baby...).

The design of the layout is based off of the necklace that I am wearing in the picture. I used the different shades of purple to match up card stock and rhinestones. The clustered rhinestones remind me of the clusters in the necklace.

Here is the original layout...


Then I thought it could use a background page to it and a few more accents...


Detail shot of the butterfly (large - Hero Arts; small - Stampabilities)... I stamped it in black ink and embossed it with clear embossing powder. Then, I applied the concord & peeled paint distress ink to color in the purple & green. Finally, I applied stickles to give it a little sparkle.


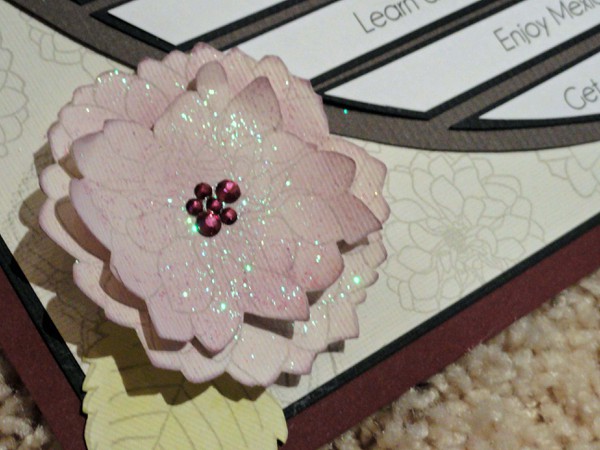
Detail shot of the stamping...I stamped in flowers in grey (stamps from Papertrey Ink) behind the flower on the lower left corner and behind the focal photo on the upper right. I cut out and sponged color onto the flower. I popped it up with dimensionals and added rhinestones. All rhinestones are from Jolee's Boutique. The handwriting stamp is Technique Tuesday (Ali Edwards).


Thanks for looking :-)