Showing posts with label card. Show all posts

Saturday, April 21, 2012

Cards for a Cause Fall 2011-Spring 2012

In an attempt to catch up on all of the happenings in our Cards for a Cause group, I am doing one massive post covering all of the cards that we have done since I privatized my personal blog last fall.** We have 73 cards pictured here that will soon be delivered to the hospital for ladies undergoing chemotherapy to use to brighten a loved one's day.  Please pray over these cards, for the people who will use them, and for those who will receive them. So without further ado, here are the cards that the most wonderful group of Christian ladies has put together over the course of this year!!!

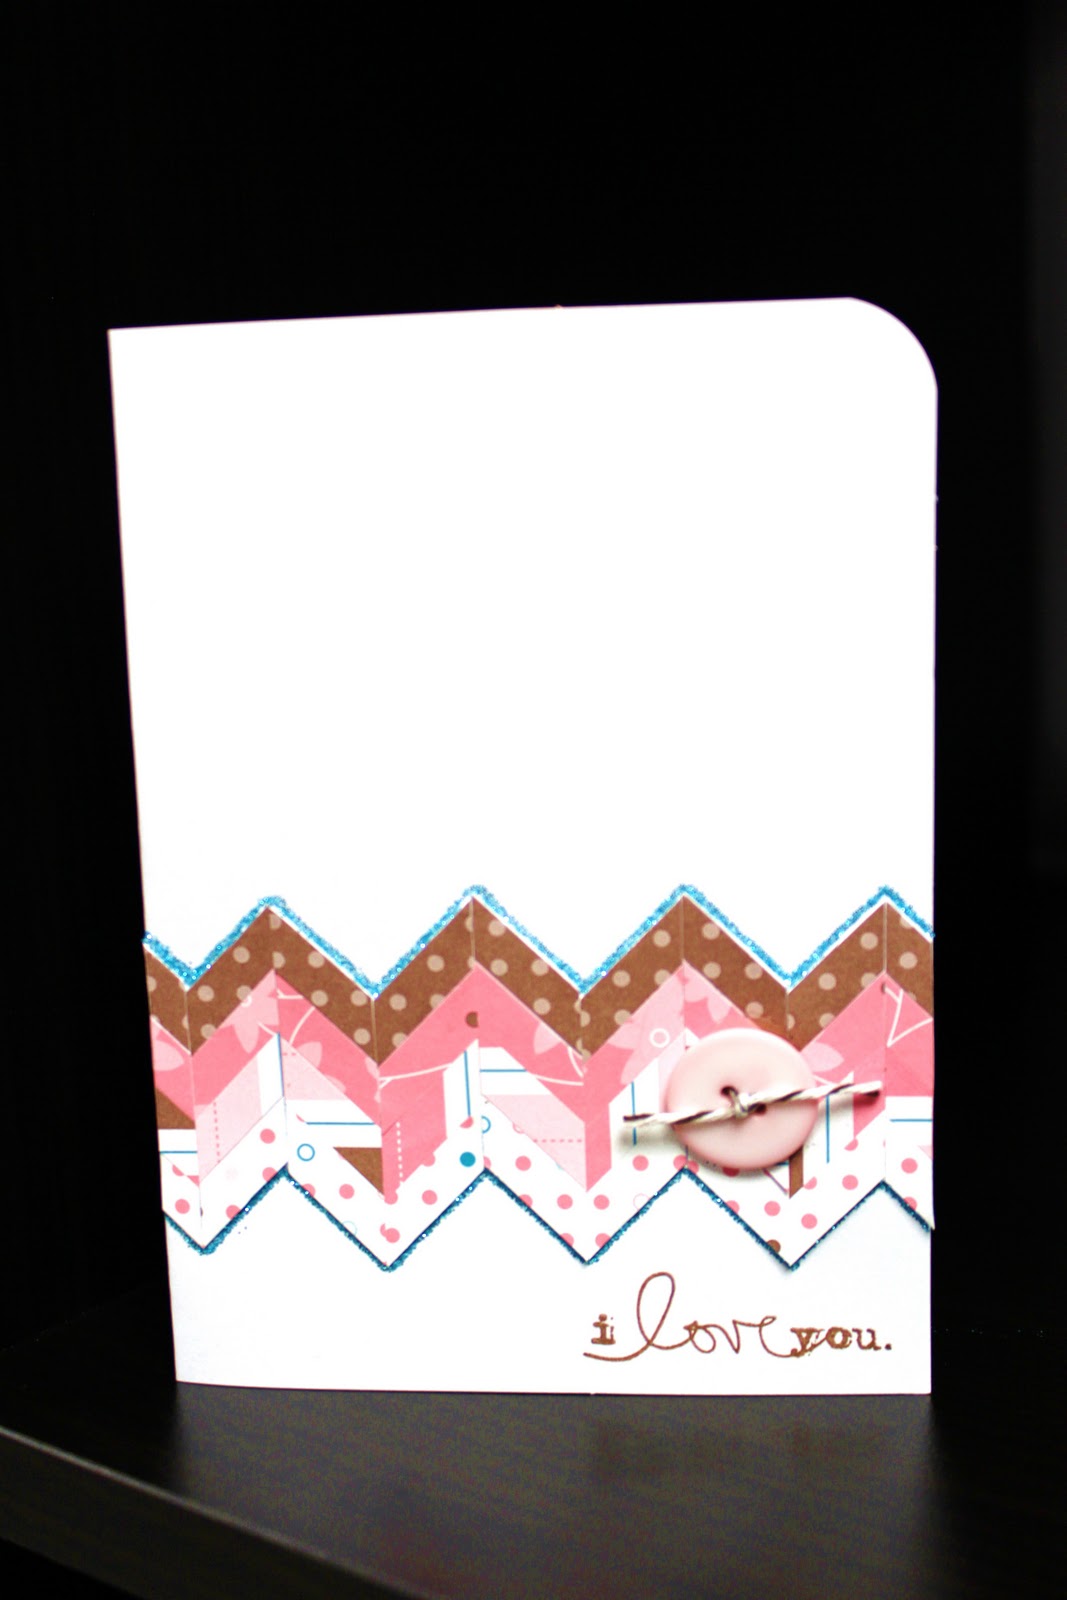
Card #1: Chevron City!


I absolutely love following Jennifer McGuire's blog, because she is one of the most talented crafters out there today. I got the idea for the chevron stripes card from her you tube video here. It includes a step-by-step tutorial if you are interested in recreating these cards. Just keep in mind, this type of card is very time consuming.


I love all of the different color schemes that were used on the cards. Some were very subdued and soft, while this one caught my eye, because of its cheeriness and how it reminds me of strawberries!


Supplies:

Cuttlebug Machine
Embossing Folders: Cuttlebug, Sizzix
Buttons & Twine: Papertrey Ink
Stamps: You Make Me Smile, Hope Your Day is Fabulous, So Sweet of You - Papertrey Ink; I love you - Ali Edwards for Technique Tuesday; Happy{Birthday} - Studio G

Card #2: Post It Mask

This card was one that I learned how to make while taking the Clean and Simple Card Class. You simply place a post it note in the center of your square card and stamp a large background stamp right over the top. The Post It masks off the center area where you can stamp your sentiment. I have found that the best combinations include versa mark ink for the background stamp, because you want it to be subtle an monochromatic and white gel pen/white ink for the sentiment. Lastly, the three little doo dads that are adhered over the sentiment should be done so with dimensional adhesive so they pop right off the page and topped with a little bit of stickles--Robbie's orders.


I didn't like this card when I first made it, but now that I have had time away from it, I realize that I really do love it!!!

I also really love this card, because the sentiment font has rounded edges just like the background stamp.

Supplies:

Stamps: Various. Many of the backgrounds are from Hero Arts, Many of the sentiments are from Studio G.
Punches: Studio G
Patterned Paper: Basic Grey
Cardstock: Various
White Ink: Colorbox Chalk Ink Frost
VersaMark Ink
Stickles
White Gel Pen (Uniball Sigmo)

Cards #3 & 4: Sending Blessings Your Way

By Diane A.

Diane always impresses me with the cards that she designs for our group. They are always very simple and easy for anyone to construct, but always pack a nice design punch and wow factor :-)

The butterflies were punched out using a large punch. The teal flower design was stamped and cut out. Very simple, yet very effective! And fun to see the same card done two different ways!


Card #5: Thinking of You

By Diane A.

Again, another job well done on Diane's end! This card looks like it would take hours, but it was actually quite easy to assemble and went very quickly!!!  Cut yellow polka dot paper, ink edges, and adhere to card base. Cut white rectangle. Add 4 patterned paper strips. Stamp sentiment. Round Corners. Ink everything. Adhere white rectangle to card. Punch 2 flowers and flower center. Glue layers to each other and down to the card. Add pearl. Done!

Great Design, Easy to Assmeble!


Supplies:

Patterned Paper: Crate Paper, Hobby Lobby
Sentiment Stamp: Studio G, Michael's


Card #6: Happy Birthday, Sweet Thing!

I was thrilled beyond thrilled when my Papertrey Ink box came in and I received the supplies needed to make this card. I just love these little playful ice cream cones that you can stack to whatever height you want!  You can cut them out of felt or use paper and add stickles to make them really sparkle!  I just love how versatile it is, too--works for both boys & girls.


Supplies:

Cuttle Bug Machine
Swiss Dots Embossing Folder - Cuttlebug
Stamps, Dies, Patterned Paper - Papertrey Ink
Rhinestones, Michael's
Stickles
Brown Ink - VersaFine Vintage Sepia
Pink - Papertrey Ink Raspberry Fizz

**I really regret having to do that, but my daughter's safety is our number one priority. I was not comfortable with the general public (I almost had 10,000 views!) knowing the ins and outs of Addison's daily routine. (Email me (only if I know you) and if you would like to follow that blog, because I can add you to my list of approved readers.)

Sunday, April 8, 2012

Birthday Card

I whipped up this birthday card for my nephew, who just turned 9. I can't believe how fast time went! I still remember rushing over to see him when he was born!!!!


I drew the star on the back side of the paper with a pencil and cut it out. The circle and star are both adhered with dimensional adhesive. The circle sticker is an old Scenic Route. 

Thanks for looking!

Wednesday, January 25, 2012

Papertrey January Blog Hop Challenge

I thought this month's challenge at Papertrey Ink to share your favorite card from 2011 and then make a new card for 2012 based on some element from your favorite was a great idea!

I love this card that I made for a Make It Monday challenge.


However, my resolution in 2012 is to make my cards more clean & simple, because that is my favorite style.  I'm not sure why sometimes I try to push myself to make a shabby card or one that is distressed...especially when I love the the clean, crisp look of white cardstock! 

So I decided to use the mat stack and try it on a different card for a clean streamlined look.  Instead of getting all inky with a brayer to roll out the woodgrain look, I just used an impression plate with no ink.  I also didn't us any ink for shading or going around the edges like I usually do.  I also used white embossing powder on the words to make it pop. I just love how it turned out!!!


Here you can see how the mat stack is the bottom layer, the sentiment strip is the middle layer, and on top is the boat layer.  I found that tiering the layers up added a lot of interest.  To achieve this, I used two different thicknesses of foam squares.

Here you can see the texture from the impression plate.

Another 2012 card goal is to start stamping a small image on the inside of the card.  Here is the litte boat this time colored with copics.
Supplies:

Thank you for your kindness
  • Stamps: Papertrey Ink - Iconic Images
  • Impression Plate: Papertrey Ink - Woodgrain
  • Dies: Papertrey Ink - Mat Stack 3 and Layerz Mat Stack 3
  • Cardstock: Paperbilities - Kraft; Papertrey Ink - Dark brown, Burgandy, Green
  • Ink: Papertrey Ink- Vintage Cream; Tim Holtz Distress Ink: Vintage Photo, Peeled Paint, Spiced Marmelade; Colorbox - Chianti
  • Glitter Pen: Sakura
  • Twine: Papertrey Ink
  • Rhinestone: Michael's

Hello Sweet Baby
  • Stamps: Boat - Papertrey Ink, Bitty Baby Blessings; Sentiments - Sweet Baby, Technique Tuesday, Ali Edwards
  • Impression Plate: Linen & Canvas - Papertrey Ink
  • Dies: Limitless Layers 1 3/4" Circle Collection, Mat Stack 3 and Layerz Mat Stack 3
  • Punches: Corner Rounder, Square Punch (to create V on sides of sentiment strip)
  • Stickles
  • Copic Markers 0 Colorless Blender, T1, BG18, and E13
  • Cuttlebug
  • Ink: Colorbox Frost White, VersaFine Vintage Sepia
  • White embossing powder, heat tool
  • Patterned Paper - My Mind's Eye Home 6"x6" stack
  • Cardstock - Aqua Mist & Ocean Tides, Papertrey Ink 

Tuesday, January 17, 2012

CAS Week 2 Entry 2 Plain White Card

I used a video from Jennifer McGuire (Studio Calico) HERE on how to create Chevron stripes on a card...Actually, I "lifted" the entire design of the card ;-) Plus, it worked so well with a plain white background...Thanks for the idea!!!

CAS Week 1 Entry 3


I am LOVING this sketch from Kristina Werner!!!  You are my card-making hero!!!

Tuesday, January 10, 2012

Clean & Simple Card Class Week #1

Keeping it simple for this class...including the blog post ;-)

I figure I would rather spend the time making more Clean & Simple cards than typing about how I did it...other than to thank Kristina for the advice on choosing colors for the card...thanks!


Sunday, January 8, 2012

dashing through the snow


Supplies
Cardstock: Hobby Lobby
Ink: Black - VersaFine; Vintage Cream - Papertrey Ink
Sleigh Die: Papertrey Ink
Stamp Set: In The Meadow (PTI)
Embossing Folder: Sizzix
Glitter Glue: Stickles, Ranger
Rhinestones colored with E57 Copic Marker
Dimensional Adhesive

Saturday, July 23, 2011

Summer Card Camp 2011 Week 4


Summer Card Camp 2011-Week 4


Two entries today!

I used a couple of stampin' up embossing folders for the background. Then I raised up a white sheet of cardstock with the corners rounded using pop dots. Lastly, I stamped white & embossed white banner flags, from Pennant Parade (Stampin' Up) and colored them in using Tim Holtz Distress Ink. They were very easy to cut out, because Stampin' up has a coordinating punch!!! Finally, I stamped the happy birthday sentiment on a strip of cardstock in black, trimmed it to look like a banner, and colored it with distress inks...added pearls & rhinestones, & done!

Love the clean look of both cards :-) These cards are more my style than the ones I've done on the blog.

Thursday, June 30, 2011

Another Week 1 Card


I love the background paper...just picked up a new SEI paperpad. It reminds me of a tropical sunrise. The stamps used were from Michael's $1 bin. The faux button on the bird was built right into the stamp...nice for keeping the card flat. The pink "string" was made by cutting an extremely thin slice of the raspberry cardstock. It worked beautifully. The clouds were cut out of glitter sticky back foam using Papertrey Ink's cloud dies. The border punch is Martha Stewart.

Thanks for looking :-)

Saturday, May 14, 2011

Make It Monday #14: Selective Inking


I always enjoy Papertrey Ink's Make it Monday challenges. It gives me a fresh idea for cardmaking each week.

This week's challenge is to ink up only part of the stamp to get a whole new look. On my cards, I used this technique to extend the length of one of the background stamps from the set, Background Basics: Retro.

Then, I used some of my new Hero Arts stamps to make a simple card with a bit of stickles on the background stamp. I just love how the Papertrey Ink stamps are versatile enough to work with other stamp sets and even sets from other companies.


Supplies:
All cards: Background Basics: Retro, PTI

"Have a Wonderful Day" Card:
Black Ink: Versafine, Tsukineko
Green Ink: Moss Green, Colorbox Chalk Ink
Pink Ink: Raspberry Fizz , Papertrey Ink
Fillable Frames #1, Papertrey Ink
Coordinating Die
Flower Fusion #1, Papertrey Ink
Tag-its #2, Papertrey Ink

Glitter Glue: Stickles, Ranger

"Thank You" and "Hello" Cards:
Congrats, Hero Arts
Ink Yellow & Grey: Studio G, Michaels ($1 bin)
Ink Raspberry Fizz (Pink): Papertrey Ink
Ink Black: VersaFine, Tsukineko
Glitter Glue: Stickles, Ranger, Papertrey Ink